Overview
With the Rockit Analytics Platform we have taken the summary data available in the Desktop and Rockit Server versions of the software and pushed it to a web based system. We have then made it possible to share that information with other people in your crew. So you can decide who gets to see how fast you sail each weekend. Debriefing during the week gets a lot easier. You record data with the Rockit software as you sail then upload the data to the cloud when you have an internet connection.
You can also build your boat configuration in the comfort of your own home then download them to your Rockit Server or laptop when you get to the boat on a Friday afternoon.

Step One: Login to the Rockit Analytics Platform
When you buy your Rockit Analytics software subscription you will be emailed a license key for the software and a login for the Rockit Analytics Platform.
Initially you will need to reset the password for the account. Go to the login page and enter your details.
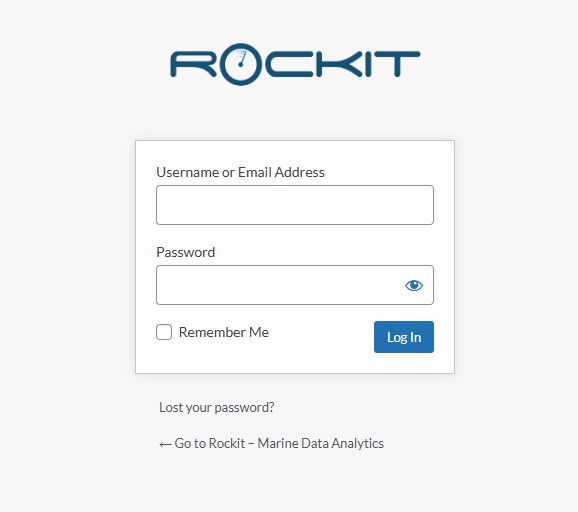
The login page also gives the option to reset you password. This will send a password reset email to the email address you supplied when you bought your Rockit Analytics license.
Logging into the platform will take you to the boat list page. Boats that you create on the platform will be displayed here.
Step Two : Create a Boat On The Rockit Analytics Platform
When you login you will be presented with list of boats that you have access to. There will be two types of boat records.
- Those boats where you are the boat owner
- Those boats where the boat data has been shared with you by the boat owner
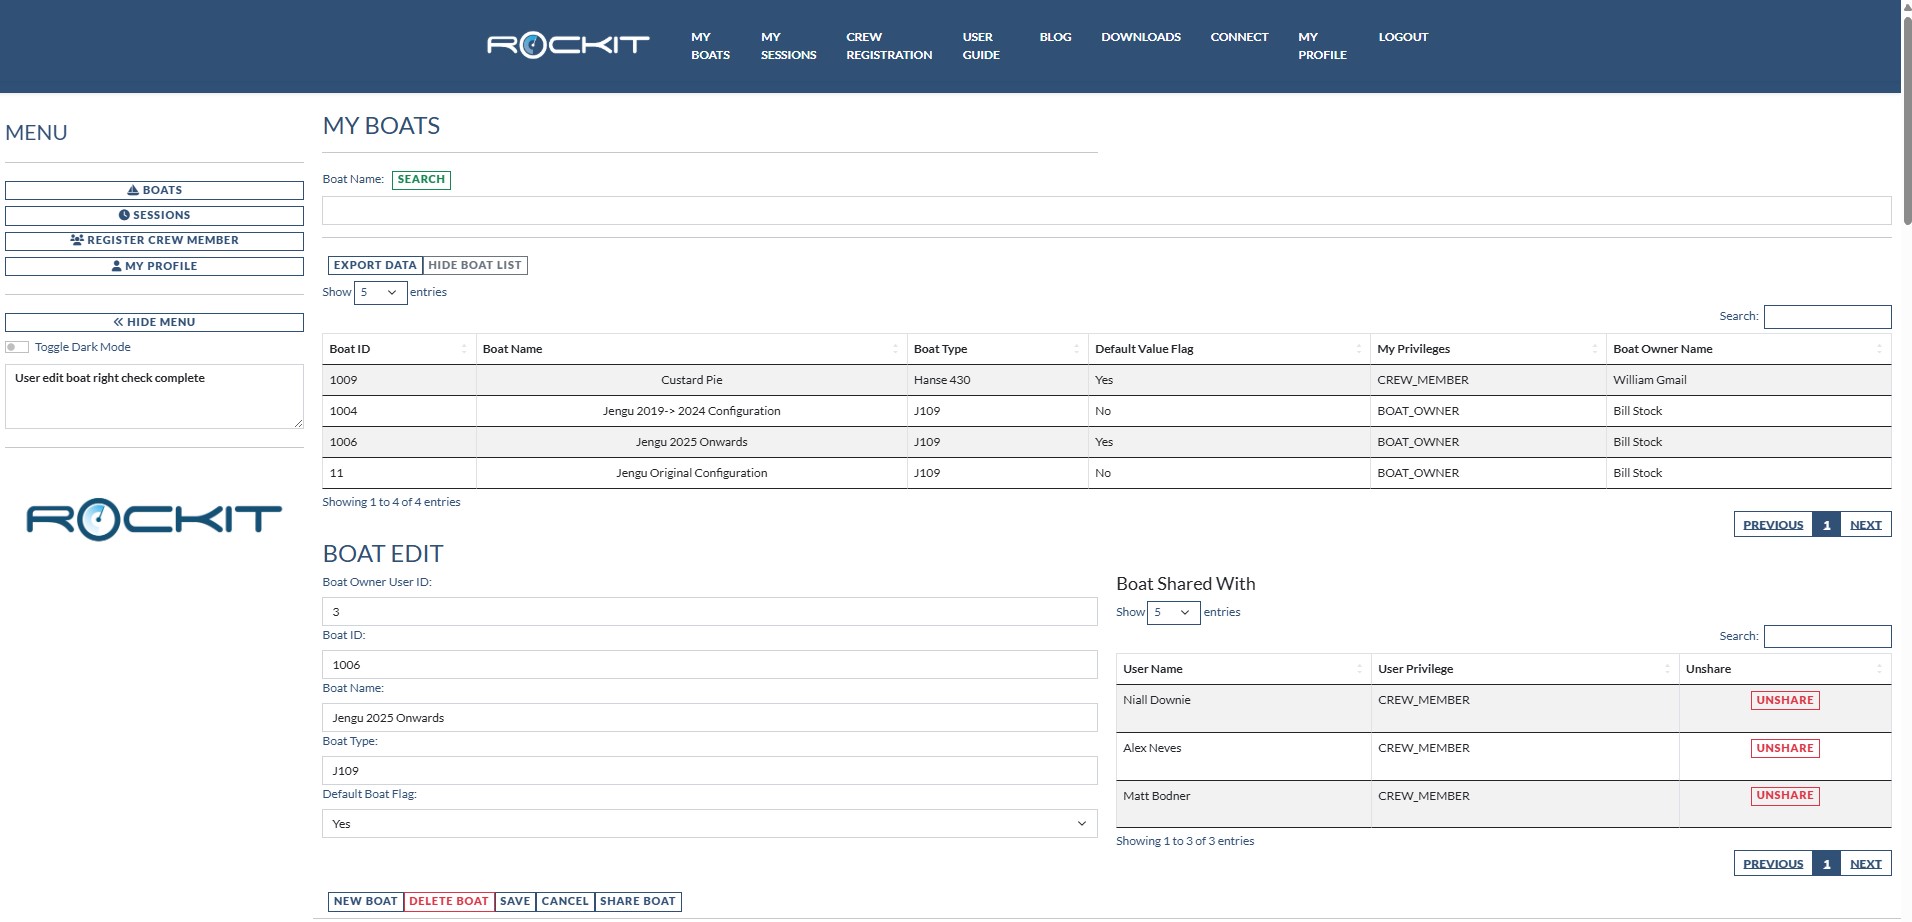
The process to create a new boat is relatively straightforward.
- Click the New Boat button
- Give the boat a name
- Give the boat a type for reference.
- Is this your main boat that you are working on; if so set the Default Boat Flag to “Yes”
- Press the Save Boat button.
This will create boat in the Rockit Analytics Platform.
Step Three : Sharing Your Boat With Your Crew
 Once you have created a boat record you can share it with your crew. Follow the steps below to complete the sharing process.
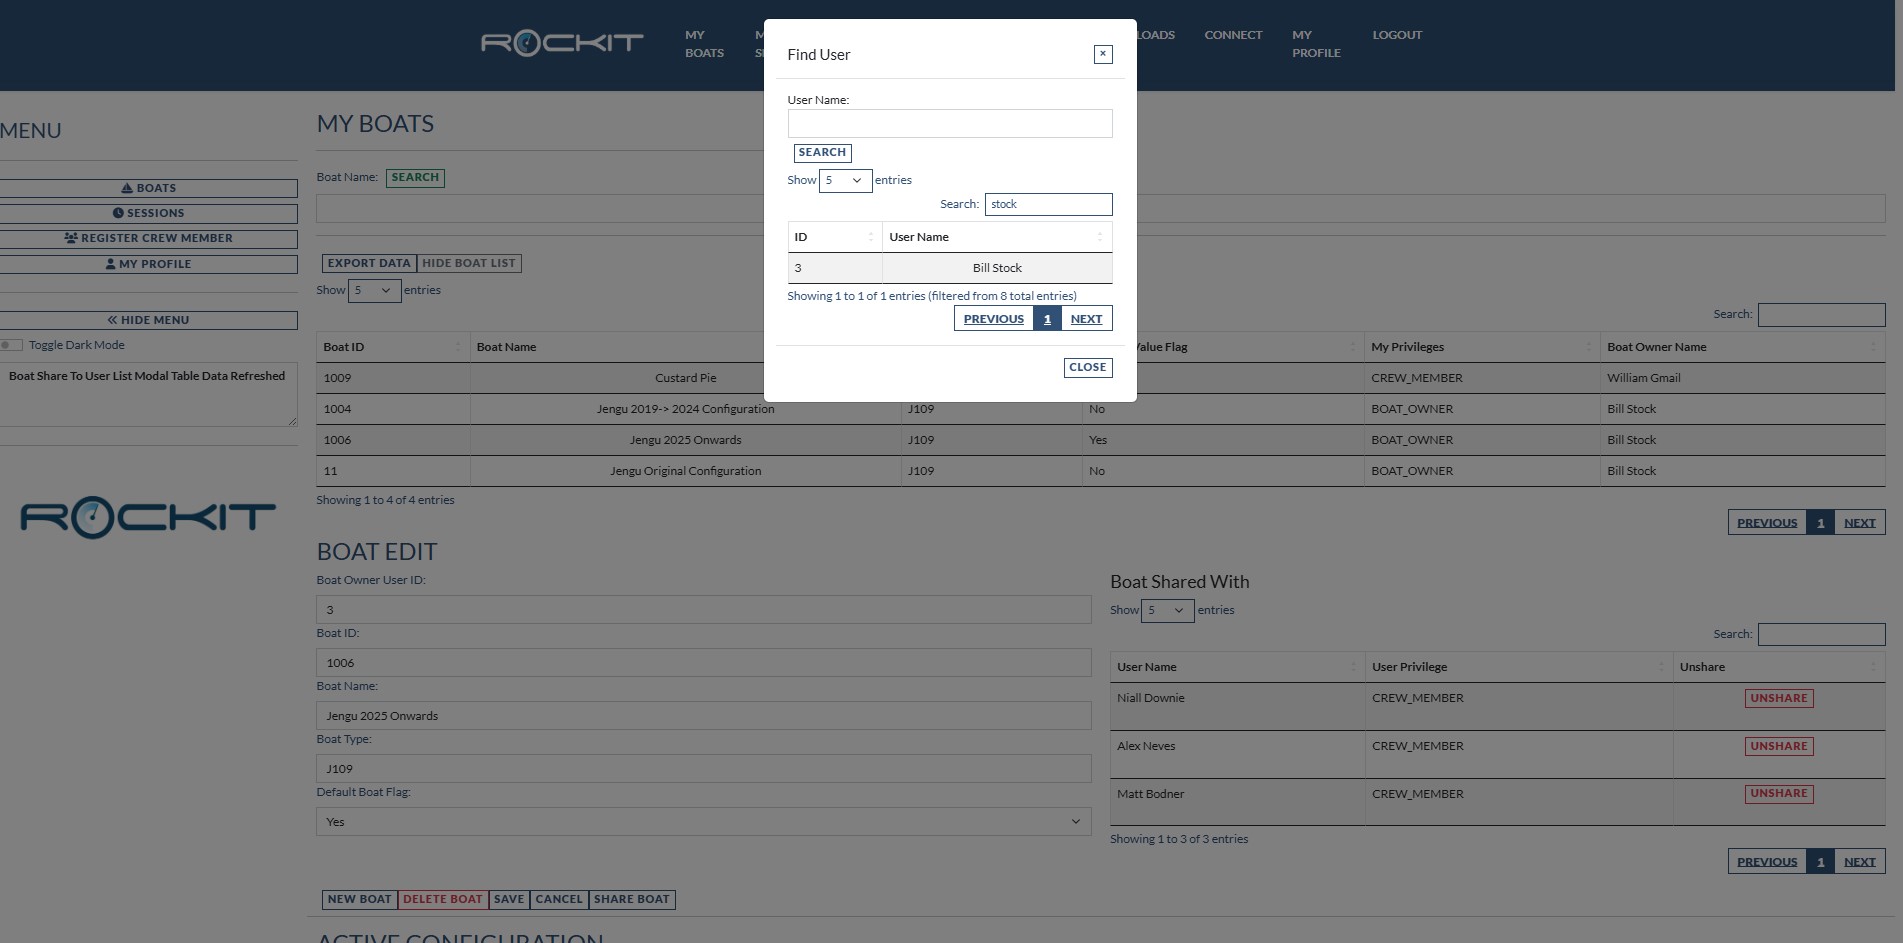
- Click the Share Boat button
- Press the Search button to bring up the list of Rockit Analytics Platform users.
- You can refine the search using either a combination of the User Name field and the search button or by entering a string in the Search box above the result table and pressing return once the list of users has been returned.
- To share the boat with the Rockit Analytics Platform user click on the user row.
- Confirm on the next dialog box that you really want to share with that user.
- The screen will now refresh the Boat Shared With table and the new user share will be displayed.
- You and the person you shared your boat with will get an email to confirm the share was successful.
You can un-share a boat from a User by clicking the red Unshare button next to their name on the Boat Shared With table. You will be asked to confirm that you want to un-share the boat. The crew member won’t get an email to confirm you have removed their access.
Step Four : Map The Rockit Platform Boat To The Boat You Are Collecting Data For
We need to map the data you collect to the Boat you have defined on the Rockit Analytics Platform.
There are three stages to this process.
- Enter your Rockit software license.
- Enter your Rockit Analytics Cloud login details on the Rockit Server or Windows computer you are running Rockit on.
- Use the Boat Management function on the Rockit Software to map the two sets of data together.
Entering you Rockit Analytics Platform login is straightforward. In the Rockit Software from the Session List screen -> Session Utilities Tab pick the Update License option. That will open the screen below.
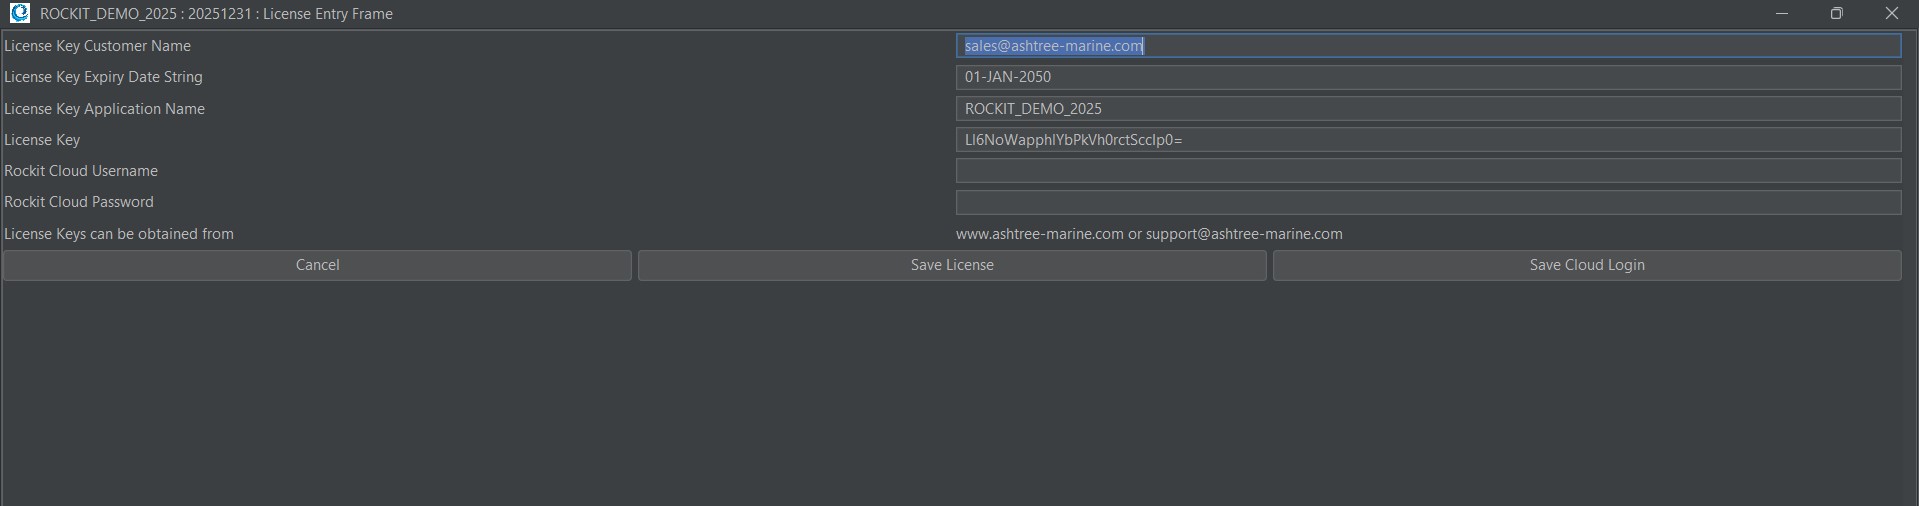
The screen shot above shows the information that will be displayed after initial installation before the paid for subscription license key and Rockit Analytics Platform login details are entered. Rockit Analytics Platform access is not possible from a demo Rockit license; the upload and download facilities are disabled.
You will have received a license key via email from Ashtree Marine. Enter those first to validate the installation. Pressing Save License will save the license key to the Rockit database on the local machine. If you miss type the license or its expired you should get an error message. Once successfully entered the software will restart so the license key takes effect.
Once the license key is entered you can add your Rockit Analytics Platform username and password. Pressing save will validate the login to the server. If you get the username or password wrong you will get an error message and be asked check the details. Once you get them correct the login details will be stored in the local Rockit database.
You now need to map the boat you have created in the Rockit Analytics Platform to the boat you have created locally on the Rockit software your are running either on a Rockit Server device or your Windows PC.
Go back to the Session Utilities tab on the Session List Screen and click the Manage Boats button. Select the boat that you are recording against.
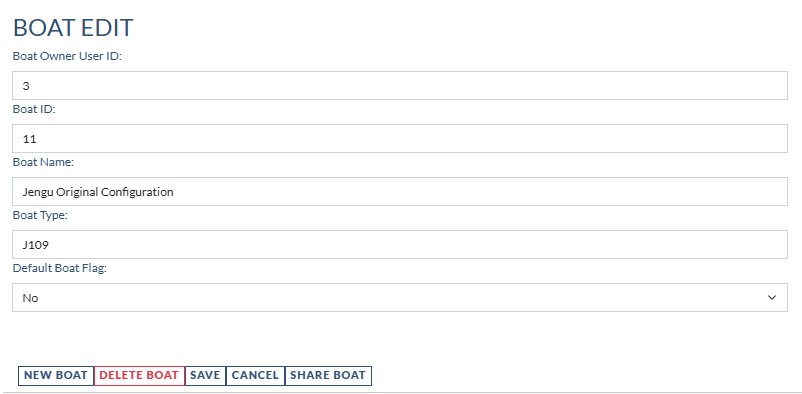
We need to enter values for the Cloud Boat Owner User ID and the Cloud Boat ID.
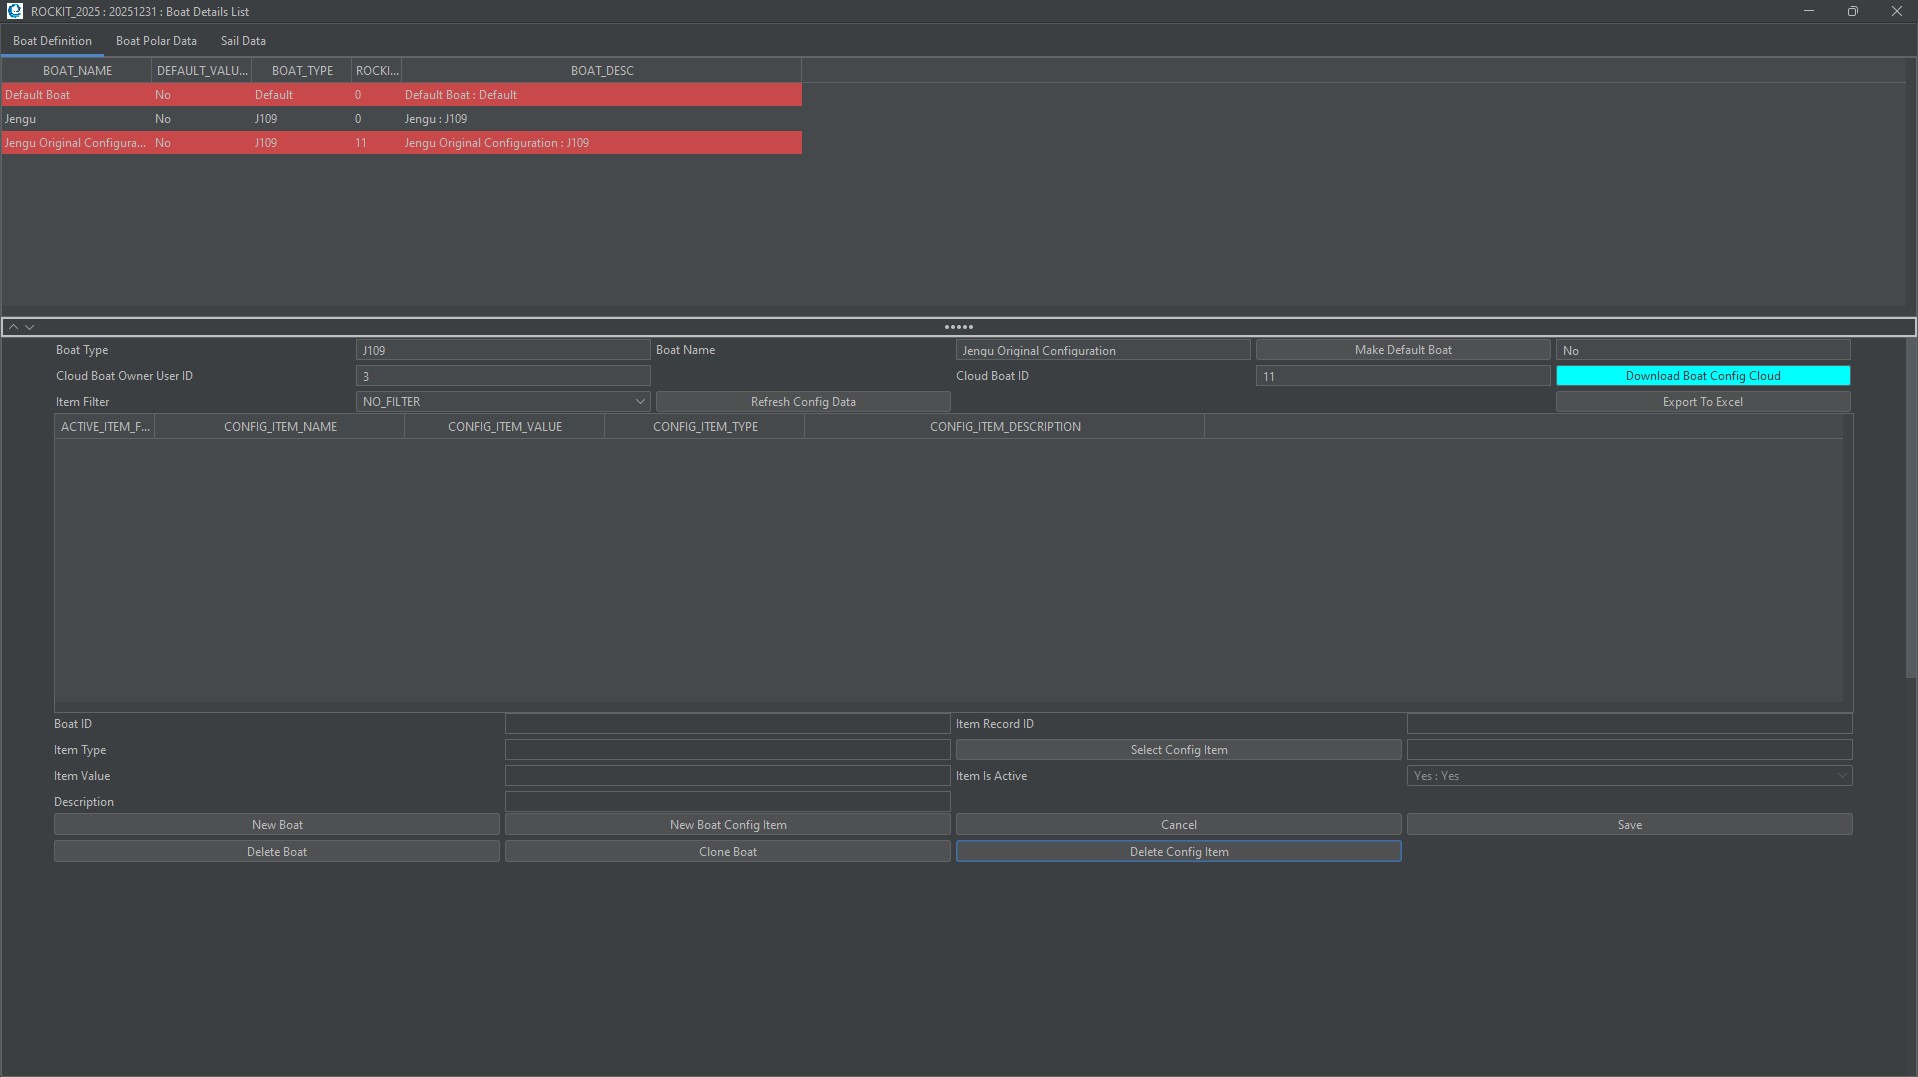
The values we pick come from the matching record in the Rockit Analytics Platform Edit Boat Page.
Type the values into Boat Details List fields on your local device and save the boat record.
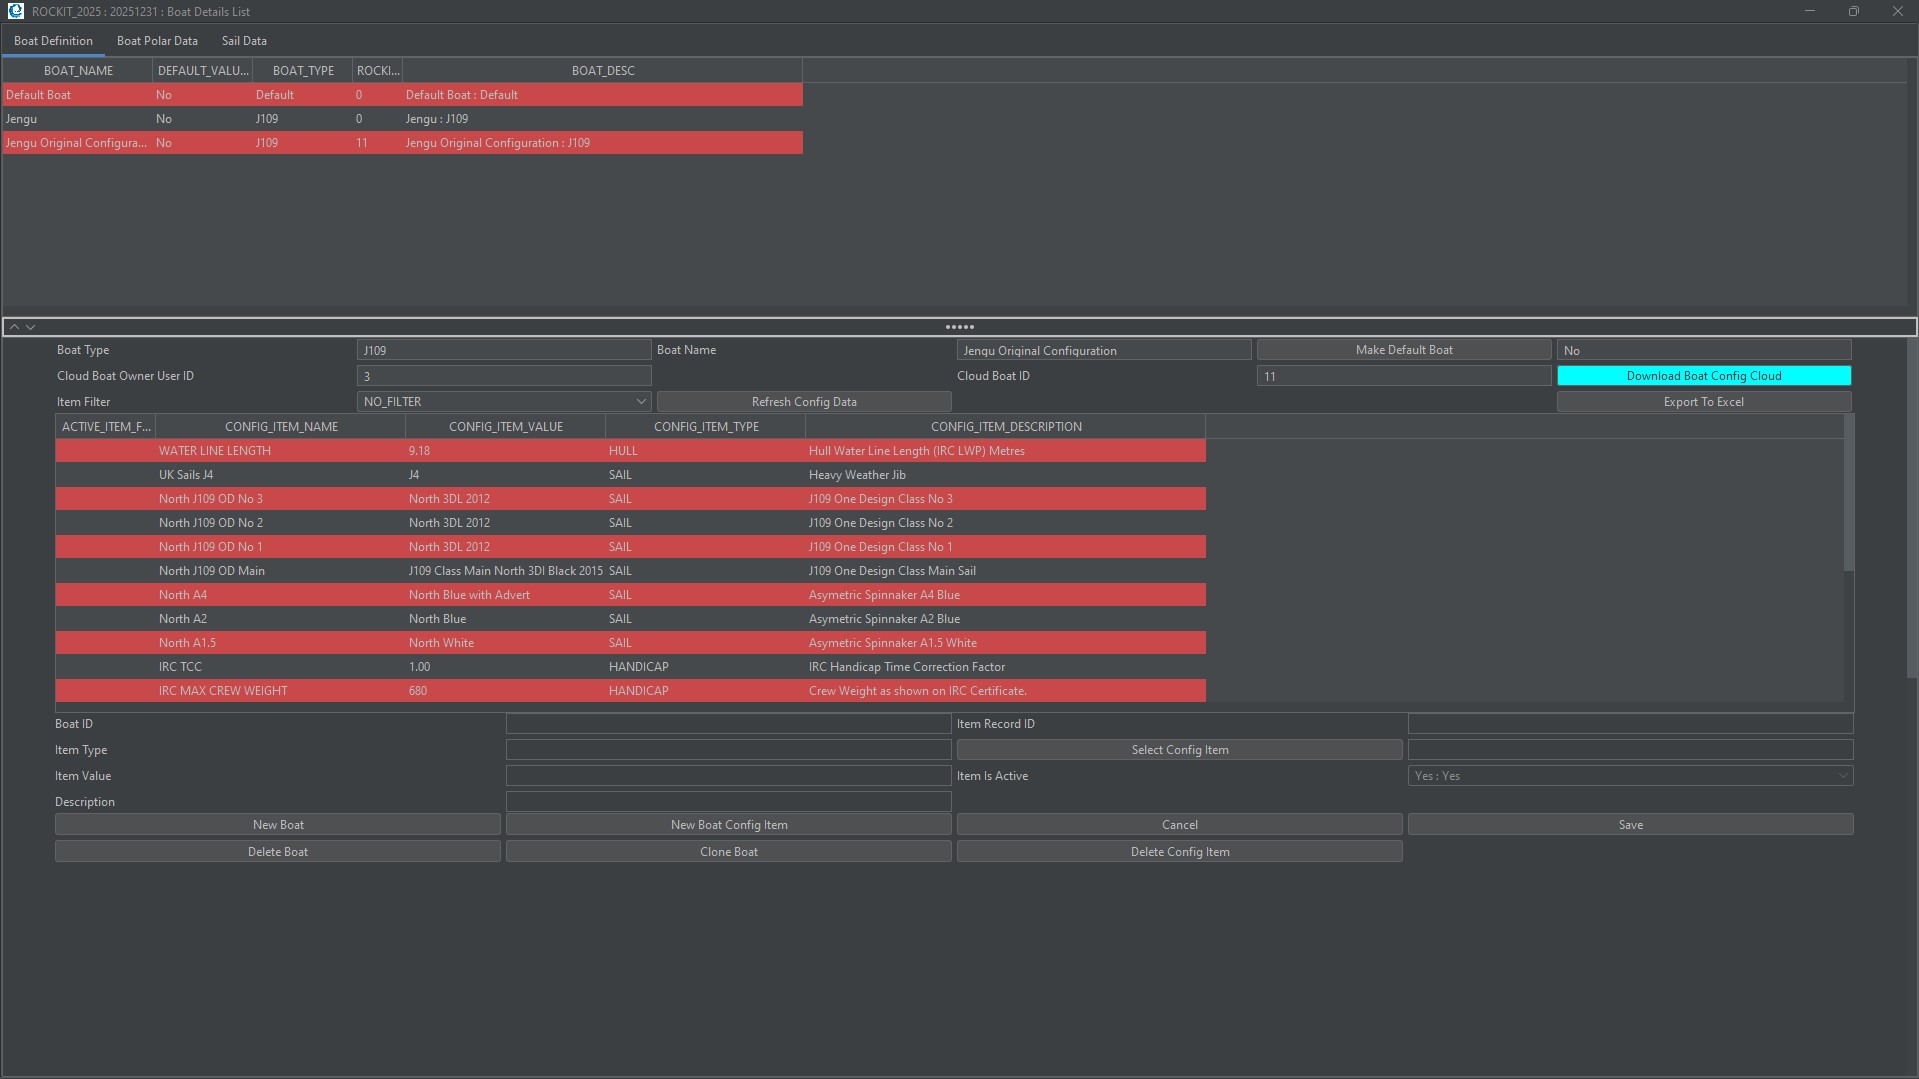
You can now test to see if the two sets of data are correctly linked together by clicking the Download Boat Config Cloud button. This will pull any Boat Configuration Information you have setup for this boat down from the Rockit Analytics Platform. If the system finds and existing matching Config Item; the Config Item Name and Type match; it will update the value and active flag stored locally otherwise it will create new Boat Configuration records. It will also copy the VPP Polar data down and overwrite any values currently stored in the local database for this boat.
Click through the dialog messages that come up. Once the process is complete you should see the screen refresh to display the records that it has downloaded.
Now that you have linked your boat to Rockit Analytics Platform successfully you can start to enter more information about it.
Step Five : Enter Information About The Boats Configuration.
This process mirrors the process followed when configuring a boat using the Boat Management functionality with Rockit on your Rockit Server device or Windows PC.
Use the Show Boat Configuration to unhide the panel with the Configuration table and edit panel.
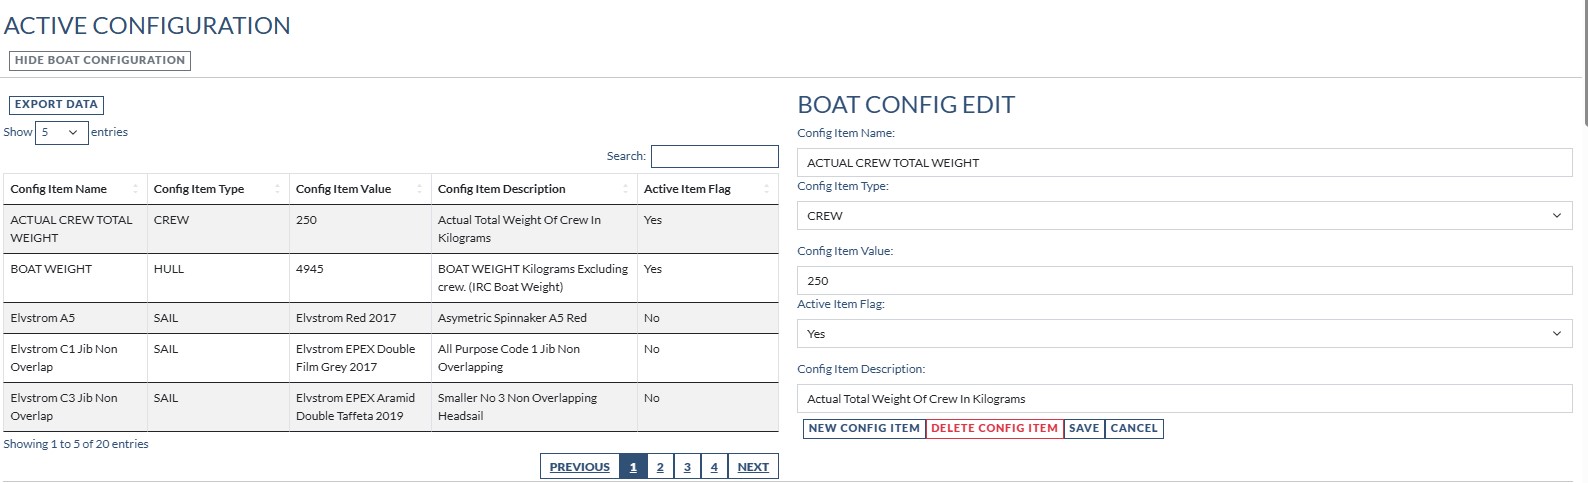
Use the edit panel on the right to edit existing values and create new ones. Once you have made you change you will need to save the record using the Save button.
A note on deleting Boat Configuration Items.
When you record session data in Rockit it will take a copy of the current Boat Configuration records for every timeslot or sample period. So if you have 300 timeslots in a session you will have 300 what we call Time Boat Config Items records. If you delete the original Boat Config item it will delete the matching Time Boat Config Item records from the boat record.
To manage something like a changing Boat Weight during the season you can change the value. So the Config Item Name is BOAT WEIGHT its TYPE is HULL its VALUE is 3500KG at the beginning of the season and for the first couple of races that will be recorded in the TIME BOAT CONFIG ITEM records. If you then go through a weight shedding exercise you can edit the value, to say 3250kg in the Boat Configuration; any new sessions recorded against this boat will have that as the VALUE for the Time Boat Config Item records for BOAT WEIGHT.
Step Six : Setting Up Velocity Prediction Programme (VPP) Polars.
Finally we need to record information about how fast we think the boat will go in different Wind Strengths and at Different Wind Angles. These become our initial Target Boat Speeds expressed as speed in knots through the water or STW.
Scroll down the boat page to the VPP Base Polars section and use the Show VPP Polar Data button to show the VPP Polar edit panel.
You have two options here. You can edit the data directly on the screen or you can upload a csv file containing the data.
Option One is relatively simple; click on a cell in the table and enter the VPP value as a decimal, click out of the cell to move to the next change. Once you have finished editing the data press the Upload VPP Polar Data button to save the information to the Rockit Analytics Platform for this Boat.
Option Two requires a bit more care. First use the Export Data button to export an empty, or partly complete set of VPP Polar data to a csv file. This creates a file in the correct format will the correct column headers, record ids and so forth. You can edit the file in a tool such as Excel (though beware of accidently changing the data formats) or an editor like Notepad. Once you have finished the edits of the file save it.
Go back to the VPP Base Polars panel and click the choose file button. Select the file you just edited. Then click the Read VPP Data File button. The software will pull the contents of the file you just edited into the VPP Polars table. If they look OK you can use the Upload VPP Polar Data button as you did in Option One to save the VPP Polars.

The VPP Polars feed into the Summary Boat Polars. Summary Boat Polars are a combination the Polars calculated by the Rockit software from the NMEA data it receives and the VPP Polars. Whichever value is higher will get displayed in the Computed Boat Polars table and graphs. It will also be used for the target boat speeds in the Rockit software.
Once you have completed the VPP Polar entry you can use the Download Boat Config Cloud button to pull the VPP and Configuration data down into the local Rockit software database.
Step Seven : Registering Crew Members
To register a brand new crew member that doesn’t already have access to the Rockit Analytics Cloud environment.
Click the Register Crew Member button on the left side menu. Enter the individuals contact details.
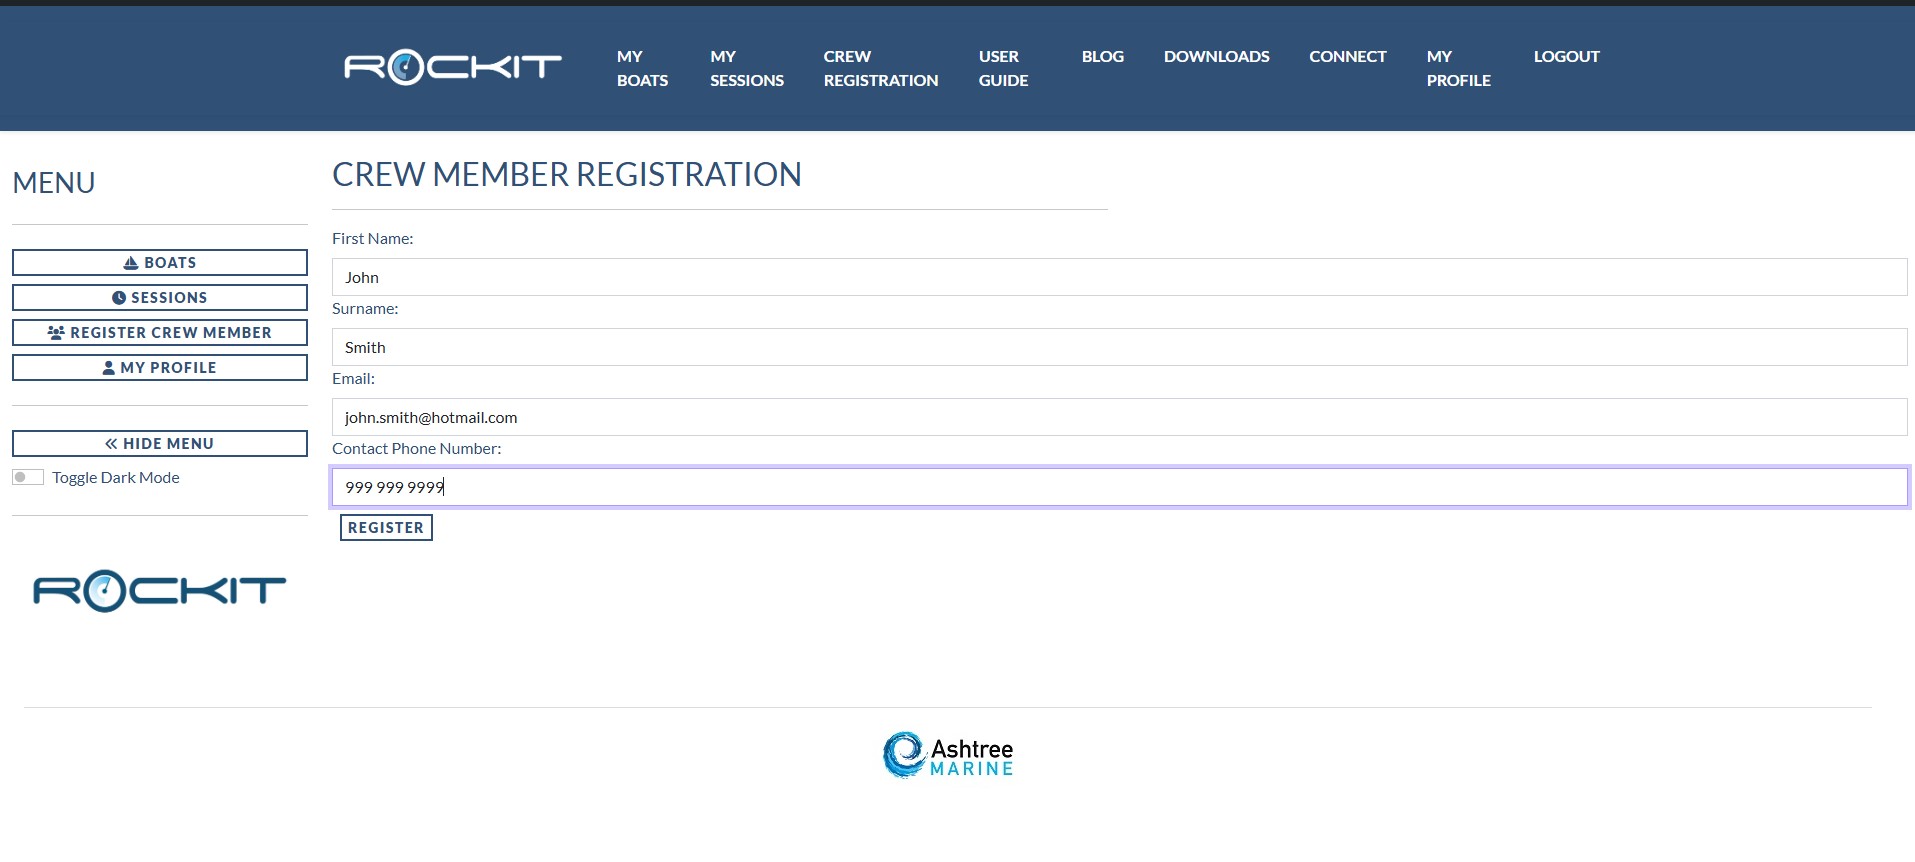
If the Crew Member isn’t registered then you will get a screen confirming the creation of the Crew Members account. The Crew Member will get an email letting them set a password and login to the system. If the email address used is already registered then you will get a warning message to that effect and the Crew Member registration will fail.
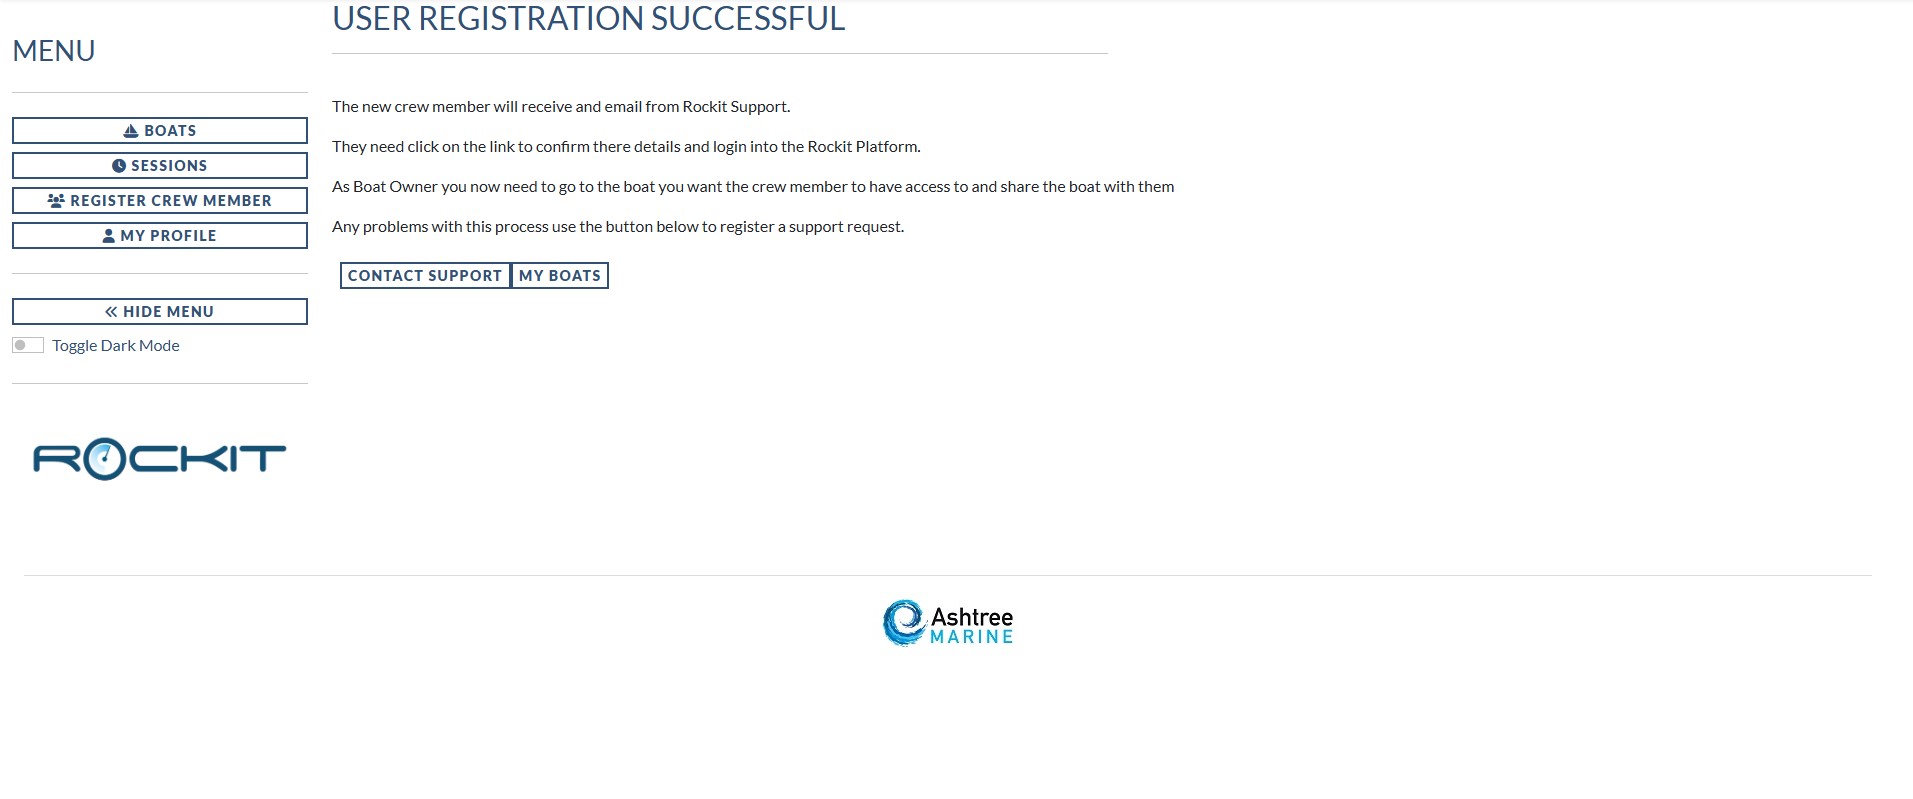
Once registered you can go to the Boat Edit panel and Share the boat with the crew member; as per the instructions in Step Three above.
Summary
You now have your boat setup both locally on your device and in Rockit Analytics Cloud. So you can move to the next stage and start to actually upload data.
The next part of the User Guide explains how to do that.